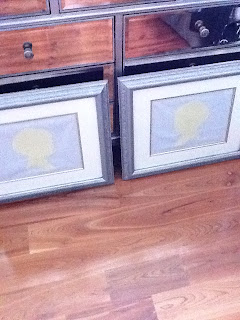
Next topic on my mind was well what wall art are we going to put with the blue toile bedding (that will be here in like 2 weeks)?!?! I wanted something different and well to be frank not too many nursery things really go with toile. Sure I could have done lambs or Peter cottontail, but I just didn't want something so generic. I'll probably end up adding those characters now that I've said that. Anyway, this is where the fabric silhouette comes in. I saw a tutorial on someones blog and sent Justin out to get the supplies I needed. I really trust him to pick out fabric? And he really loves me, obviously for going to Jo Ann's crafts.
Things you will need to get started:
Heat N Bond
Fabric for your background and a contrasting fabric for the silhouette
Really small, sharp scissors
Iron
Frame - to show off your masterpiece. In our case, we had two antique gold finish frames that I had purchased last year from TJ Maxx that I was planning on putting wedding portraits in. (those just got ordered last week by the way). Justin bought pewter spray paint and painted them for me to match the room.
Google silhouette, or whatever kind of image you want to showcase. Make sure it is large enough to show up well on the fabric. Print that baby out and then cut it out.
Cut out background fabric to desired size. Ours was 11x14.Trace image onto the backside of the fabric you chose to be the silhouette. Please use a pencil so it doesn't show on the 'good' side.
Then do the same thing on the heat n bond. It was hard to actually trace the image onto the heat n bond so I just held it in place while I cut out the image.Now, heat up your iron. Match heat n bond up with your silhouette and place the PAPER side of heat n bond up so that you are ironing that.
It should be stuck onto your fabric silhouette now.
Last, place background fabric onto ironing board and bond your fabric silhouette to it!
If you are putting your handy work in a frame, go for it so that you can hang your first piece of fabric wall art!!
This was so super easy and obviously can be done while in bed. Haha. Justin did the ironing portion to make sure I didn't cheat. He's a handy husband!
 |
| Apparently |
 |
| And a sneak peek of our dresser |
XoXo


Now, make us one LOL .
ReplyDeletelove them!
ReplyDeletecrafty!!! : )
ReplyDelete